October 02, 2009 •
Comments
Prerequisites:
sudo aa-complain cupsd
sudo mkdir /usr/share/cups/model
Download drivers:
wget http://solutions.brother.com/Library/sol/printer/linux/dlf/mfc490cwlpr-1.1.2-2.i386.deb
wget http://solutions.brother.com/Library/sol/printer/linux/dlf/mfc490cwcupswrapper-1.1.2-2.i386.deb
Install drivers:
sudo dpkg -i --force-all ./mfc490cwlpr-1.1.2-2.i386.deb
sudo dpkg -i --force-all ./mfc490cwcupswrapper-1.1.2-2.i386.deb
Now we need to configure the printer. Open your browser, go to http://localhost:631/printers and then cllick Modify Printer. Set the following:
Device: LPD/LPR Host or Printer
Device URI: lpd:///binary_p1
Make/Manufacturer Selection: Brother
Model/Driver Selection: Your printer's name
The printer is configured. You may now print a test page.
October 01, 2009 •
Comments
Pairing my Bluetooth headset to the laptop was easy, but it took a bit of digging to get it working with Skype. The steps I followed are below.
Find the MAC address of the headset:
hcitool scan
Paste the following into ~/.asoundrc:
pcm.headset {
    type bluetooth
    device 00:00:00:00:00:00
    profile auto
}
Enable the sound drivers:
sudo hciconfig hci0 voice 0x0060
Tell PulseAudio that the Bluetooth headset exists:
pactl load-module module-alsa-sink device=headset
pactl load-module module-alsa-source device=headset
*Note that the above commands will have to be executed after every reboot. I suggest throwing them in a shell script for easy access.
Once paired, you may open Skype and set the sound device settings to use the Bluetooth headset.
September 28, 2009 •
Comments

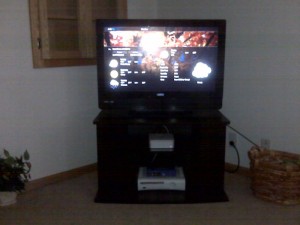
I installed Plex Media Center for OS X on my Intel Mac Mini and hooked it up to the HDTV. This is a perfect alternative to my classic Xbox running Xbox Media Center since the older hardware simply lacks the capability to play HD content. To control the Mini, I use Rowmote Pro on my iPhone.
Originally I was running Windows 7 in a VM and steaming media to the Xbox 360, but it didn't take long to realize how horrible of an idea that was. It's a huge relief not having to deal with that mess anymore.
September 25, 2009 •
Comments
If you've configured your wireless access point to use TKIP+AES encryption for your EeePC 901, the default rt2860 (v1.8.0.0) kernel module included in Ubuntu 9.04 will not allow you to authenticate and connect to the wireless network. The only way to get this working is by downgrading to v1.7.1.1.
Download Module
wget http://www.array.org/ubuntu/dists/intrepid/eeepc/binary-i386/rt2860-dkms_1.7.1.1_all.deb
Remove Old Module
cd /lib/modules/`uname -r`/kernel/drivers/staging/rt2860/
sudo mv rt2860sta.ko rt2860sta.bak
Install New Module
sudo dkpg -i rt2860-dkms_1.7.1.1_all.deb
Reboot upon completion and connect to your wireless network.
EDIT: Looks like the latest Ubuntu 9.04 updates have fixed this issue?
September 25, 2009 •
Comments
Share your BlackBerry's Internet connection with OS X and Linux. This is geared towards the US Cellular network.
Ubuntu
Start of by setting up Blueman. Add the repository and then install:
echo "deb http://ppa.launchpad.net/blueman/ubuntu jaunty main" >> /etc/apt/sources.list
apt-get install blueman
Run Blueman, pair the devices and enable dial up networking (DUN). We will then need to open NetworkManager and make a new entry in the Mobile Broadband tab. I chose US Cellular from the providers. From there, enter your username (1234567890@uscc.net) and password (1234567890). You should now be able to connect.
OS X
- Vendor: Generic
- Model: Dialup Device
- Telephone Number: #777
- Account Name: 1234567890@uscc.net
- Password: 1234567890
September 25, 2009 •
Comments
One of the most irritating things about Firefox is the fact that it adds a dotted border around every active and clicked link. To disable that, all you have to do is go into about:config and set the following:
browser.display.focus_ring_width 0
September 25, 2009 •
Comments
If you want to force Firefox to perform all of its DNS lookups over your SOCKS proxy tunnel, set network.proxy.socks_remote_dns to true in about:config.
September 25, 2009 •
Comments
Git is a free & open source, distributed version control system designed to handle everything from small to very large projects with speed and efficiency.
Install Git
sudo apt-get install git-core gitweb
Create Central Repository
mkdir git
cd git
mkdir project.git
cd project.git
git --bare init
vim ./description
Create Development Repository
mkdir project
cd project
git init
git status
vim .gitignore
git add .
git commit -a -m "initial commit"
git remote add origin user@host:git/project.git
Initial Push
git push origin master
September 25, 2009 •
Comments
Don't feel like shelling out the cash for a Time Capsule? Use Time Machine to backup your data on a local Samba share instead.
Create the sparsebundle image
hdiutil create -size $SIZEg -fs HFS+J -type SPARSEBUNDLE -volname "Backup of $HOSTNAME" $HOSTNAME_$MACADDRESS.sparsebundle
Copy to share
cp -r ./$HOSTNAME_$MACADDRESS.sparsebundle /Volumes/share
Enable unsupported volumes
defaults write com.apple.systempreferences TMShowUnsupportedNetworkVolumes 1
Ensure that the backup location is mounted after running the above command. Open the Time Machine preferences and you can now choose the network share as a backup point.
Snow Leopard
If you are running OS X 10.6, the following steps must be completed before this will work.
cd /Volumes/share/$hostname.sparsebundle
vim com.apple.TimeMachine.MachineID.plist
Paste the following:
<xml version="1.0" encoding="UTF-8">
<!DOCTYPE plist PUBLIC "-//Apple//DTD PLIST 1.0//EN"
 "http://www.apple.com/DTDs/PropertyList-1.0.dtd">
<plist version="1.0">
<dict>
	<key>com.apple.backupd.HostUUID</key>
	<string>$UUID</string>
</dict>
</plist>
$UUID can be found in System Profiler.
September 25, 2009 •
Comments
VMware Server provides no real effective way to access the VM's console for OS X users. My buddy Major showed me a brilliant alternative.
Power down your VM and add the following to the .vmx file:
RemoteDisplay.vnc.enabled = "TRUE"
RemoteDisplay.vnc.password = "password"
RemoteDisplay.vnc.port = "5900"
You may not want to edit this file while the VM is running. Power on the VM to enable the changes. Point your VNC client to the VMware Server, connect and enjoy!
Source: RackerHacker.com
